WhatsApp integration: How to integrate WhatsApp with Google Sheets, Zoho CRM and more using Webhooks

Here's a scenario that's sadly common: Picture a customer service rep named Alex, overwhelmed by WhatsApp chats, manually updating CRMs, and facing an ever-growing to-do list. Alex's daily grind is fraught with potential errors—leading to missed details, inaccurate data entry, and the looming threat of unhappy customers.
With WhatsApp integrations, it doesn't have to be this way. In this blog, I will explain how a simple technology—Webhooks—can solve these challenges by automating the transfer of data between messaging apps and other platforms like internal databases, CRMs, Google Sheets, and more. This allows customer service reps like Alex to focus on what truly matters: building stronger customer relationships.
What are Webhooks?
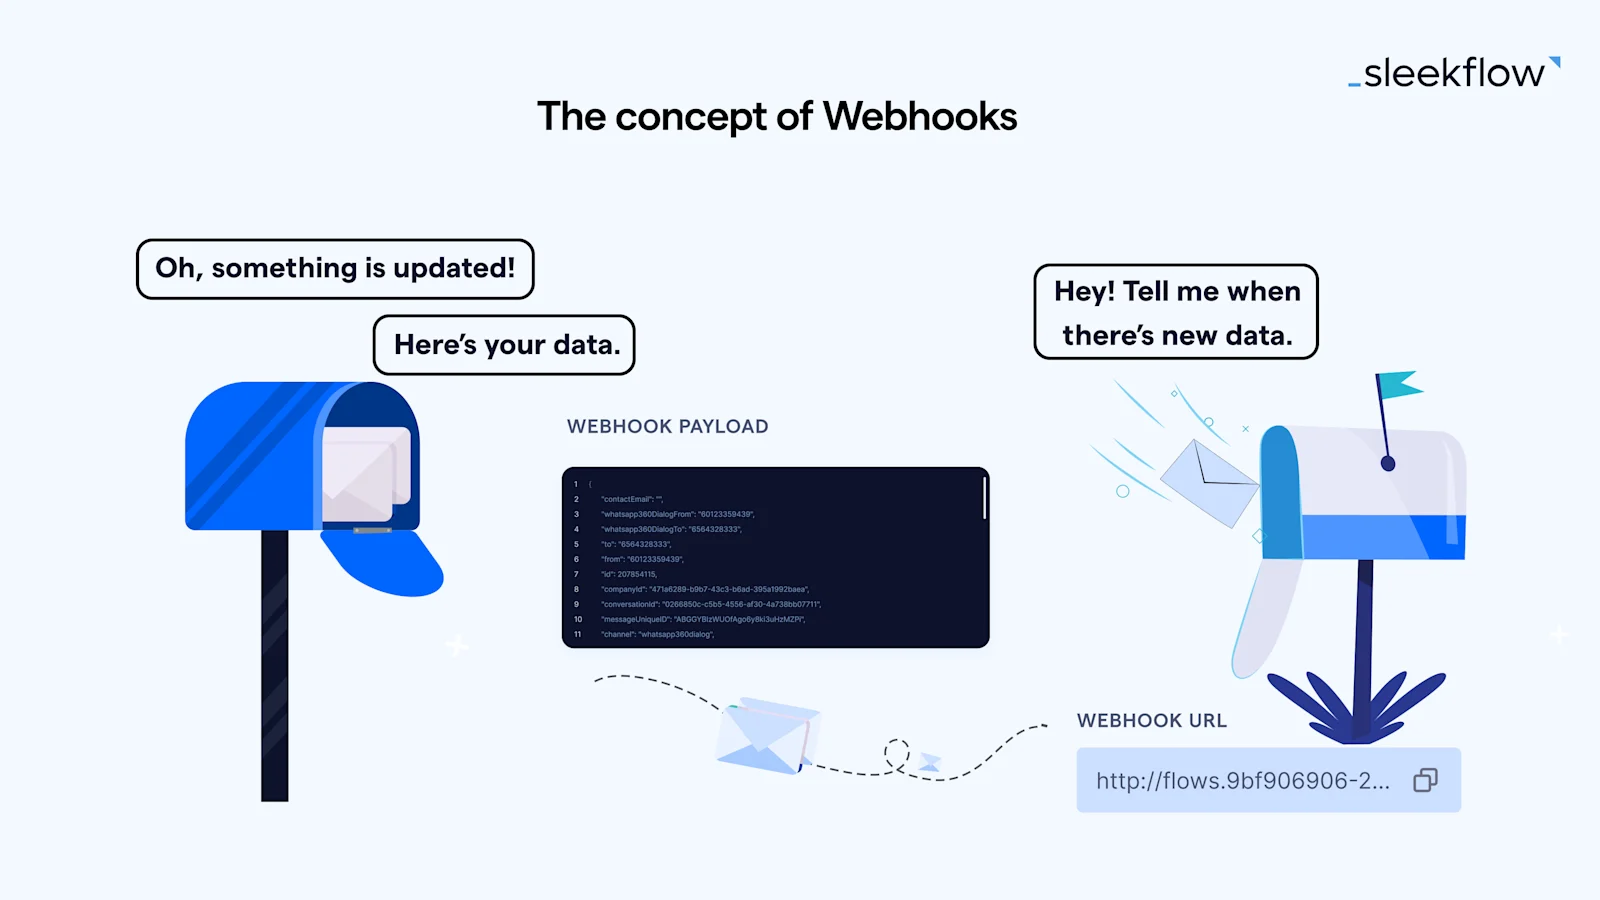
Webhooks are like a postal system for apps. When something specific happens in one app, it sends a letter (information) directly to another app's mailbox (a unique web address or URL). The letter, in this context known as a payload, carries all the details about the event that just occurred. The beauty of Webhooks lies in their ability to actively listen for these events and automatically send the payload, ensuring the receiving app is immediately updated with the information
Here's how it breaks down:
Setup: Your website has an enquiry form, and you want to send a WhatsApp message to customers right after they submit their enquiry, saying "We've received your enquiry."
Trigger: When a customer submits the form, this triggers your website to send a payload to the WhatsApp messaging service. The payload includes the customer's phone number and the enquiry details.
Webhook URL: The messaging service provider gives a special URL for your website to send these payloads. This is like for you to drop a letter into a specific mailbox.
Action: The message service provider constantly monitors this URL. When it gets your payload, it immediately sends the "We've received your enquiry" WhatsApp message to the customer.
When to use a Webhook?
Webhooks are incredibly useful when you want to automate event-driven tasks between SleekFlow and other platforms. Here are a few ways you might want to use a Webhook:
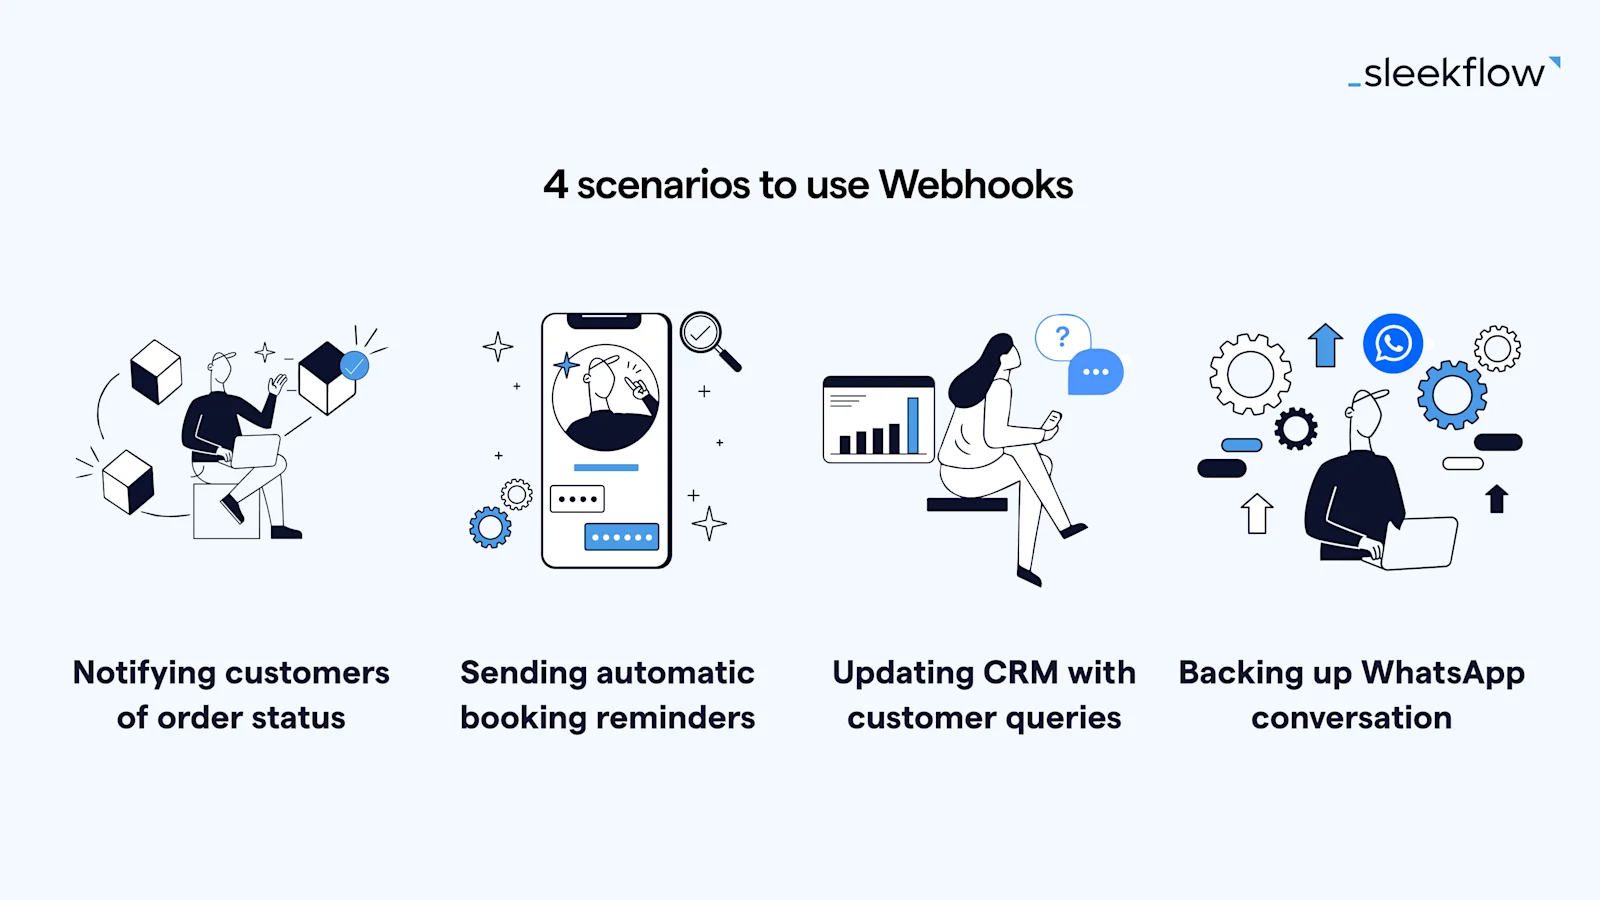
Notifying customers of order status: If you run an online store, Webhooks can link your e-commerce platform (like WooCommerce or Magento) to WhatsApp. When an order's status changes, a Webhook automatically sends a WhatsApp message to your customer with the update, keeping customers informed and reducing "Where's my order?" queries.
Sending automatic booking reminders: For salons or clinics, the sales team can use Webhooks to connect an appointment system (like Calendly) to WhatsApp. This automatically sends reminders to clients about their upcoming appointments, reducing no-shows and ensuring schedules run smoothly.
Updating CRM with customer queries: Customer support teams can set up Webhooks to automatically convert messages from WhatsApp into tickets in CRM tools like Zendesk or Zoho, or log them into Google Sheets. This ensures no query goes unnoticed.
Backing up WhatsApp conversations: Operations managers in finance or healthcare can use Webhooks to facilitate automatic backups of WhatsApp chats into internal databases. This keeps chat records organized and audit-ready.
The first two cases involve external actions causing SleekFlow to respond (inbound) using triggers. The last two use cases are about sending data from SleekFlow to other systems (outbound) using specific actions. Next, we'll explain the different triggers and actions in Flow Builder that manage these inbound and outbound data flows.
3 types of Webhook triggers and actions in Flow Builder
1. Webhook received trigger
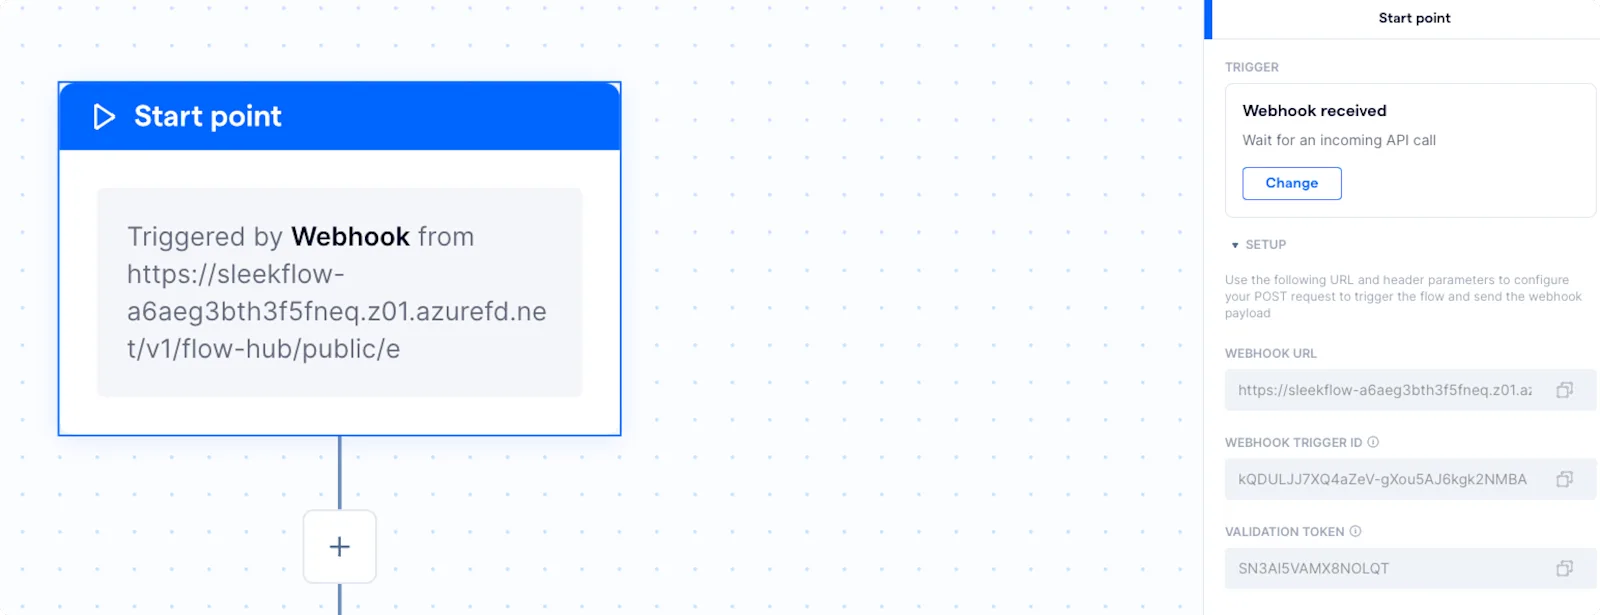
This trigger creates a Webhook URL when set up, which you need to share with the external platform. This tells the platform where to send data (payload) to SleekFlow. For example, when a new order is placed on an e-commerce site, and SleekFlow gets the order details, it triggers the corresponding workflow in SleekFlow.
A few prerequisites on the external platform include:
It must be able to send a payload to a Webhook URL.
It allows you to customize header parameters along with the Webhook URL for authentication purposes.
The payload must contain data that gives SleekFlow context about the unique customer, such as SleekFlow contact ID, phone number, or email address.
2. Pass triggered message Webhook payload actions

This action takes what you get in a SleekFlow message—text, files, customer name, phone number, etc.—as a payload to another app. It's particularly useful when you want to use the details from a WhatsApp conversation to trigger specific actions in other platforms, such as logging a support ticket in a CRM or initiating a follow-up task in a project management tool. Before using this action, you need to create a Webhook URL on the destination platform and input it into Flow Builder.
3. Pass contact Webhook payload action
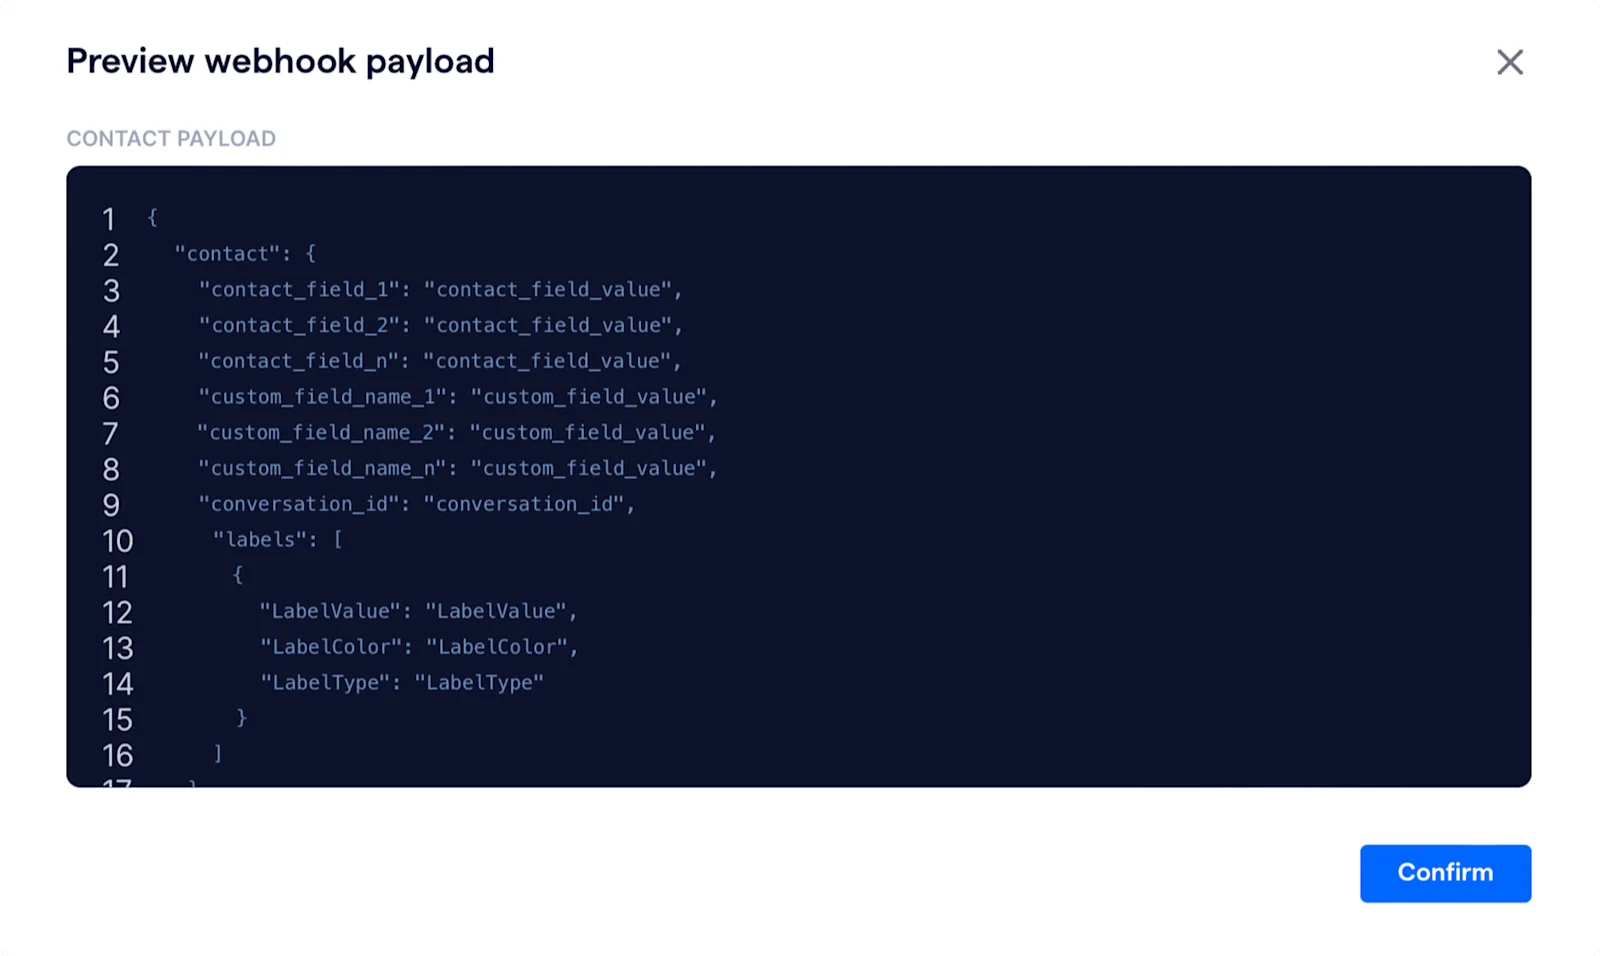
While the previous action focuses on message content, this one is tailored for contact data. It's designed to sync contact information changes from SleekFlow to external systems. For instance, if a staff updates a customer’s address in SleekFlow, the action can automatically update the customer's record in your CRM. This ensures your external systems always have the latest contact details. Similar to message payload actions, you'll need to establish a Webhook URL on the external platform to enable this data exchange.
How to integrate SleekFlow with Zoho CRM via Webhook (inbound data flow)
Imagine a real estate agency that uses Zoho CRM to manage client contacts and SleekFlow for communicating with clients via WhatsApp. They want to streamline their process so that whenever a client's information is updated in Zoho CRM—like a change in viewing date or contact details—a personalized WhatsApp message is automatically sent to the client acknowledging the update. This automation can be achieved by integrating SleekFlow with Zoho CRM using a Webhook.
Here's a step-by-step guide:
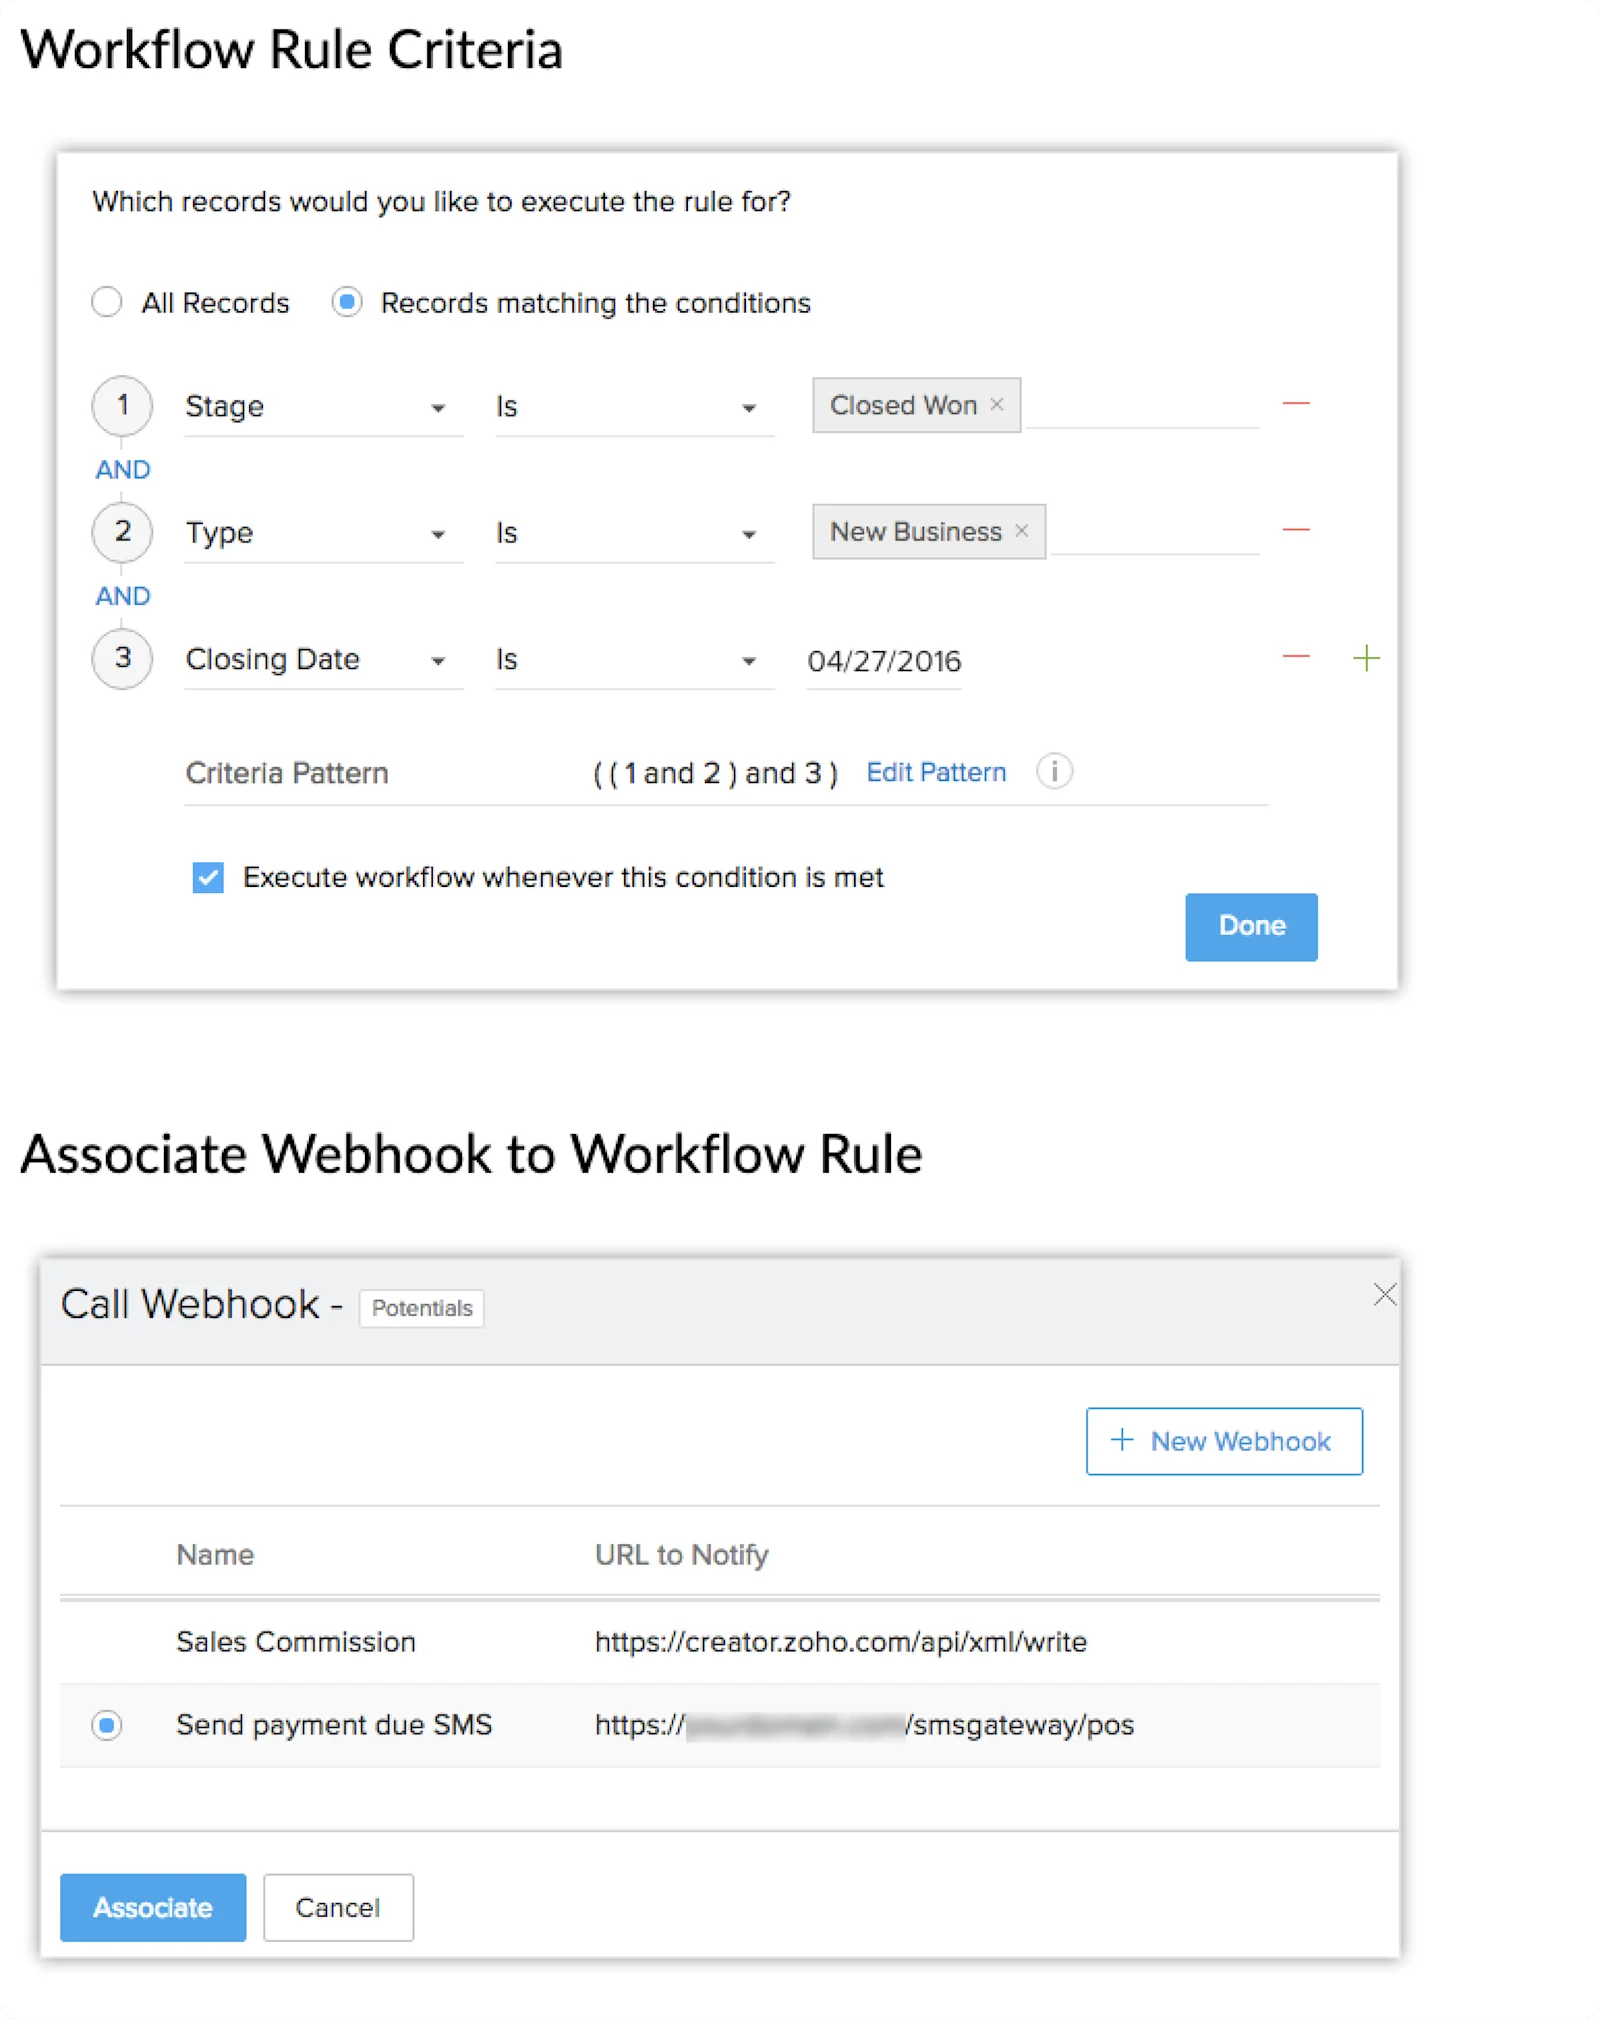
1. Set up a new workflow on Zoho:
Start by defining the rules in Zoho that trigger the workflow. For example, when a contact's details are updated.
Click + New Webhook within the workflow settings to link a Webhook to this workflow.
You'll need a unique Webhook URL from SleekFlow for this step (see step 2 below).
2. Configure a new flow trigger in SleekFlow:
In SleekFlow, select the Webhook Received Trigger option and click to generate.
Copy the unique Webhook URL provided by SleekFlow.
Go back to Zoho's Webhook configuration and paste this URL, ensuring Zoho knows where to send updates.
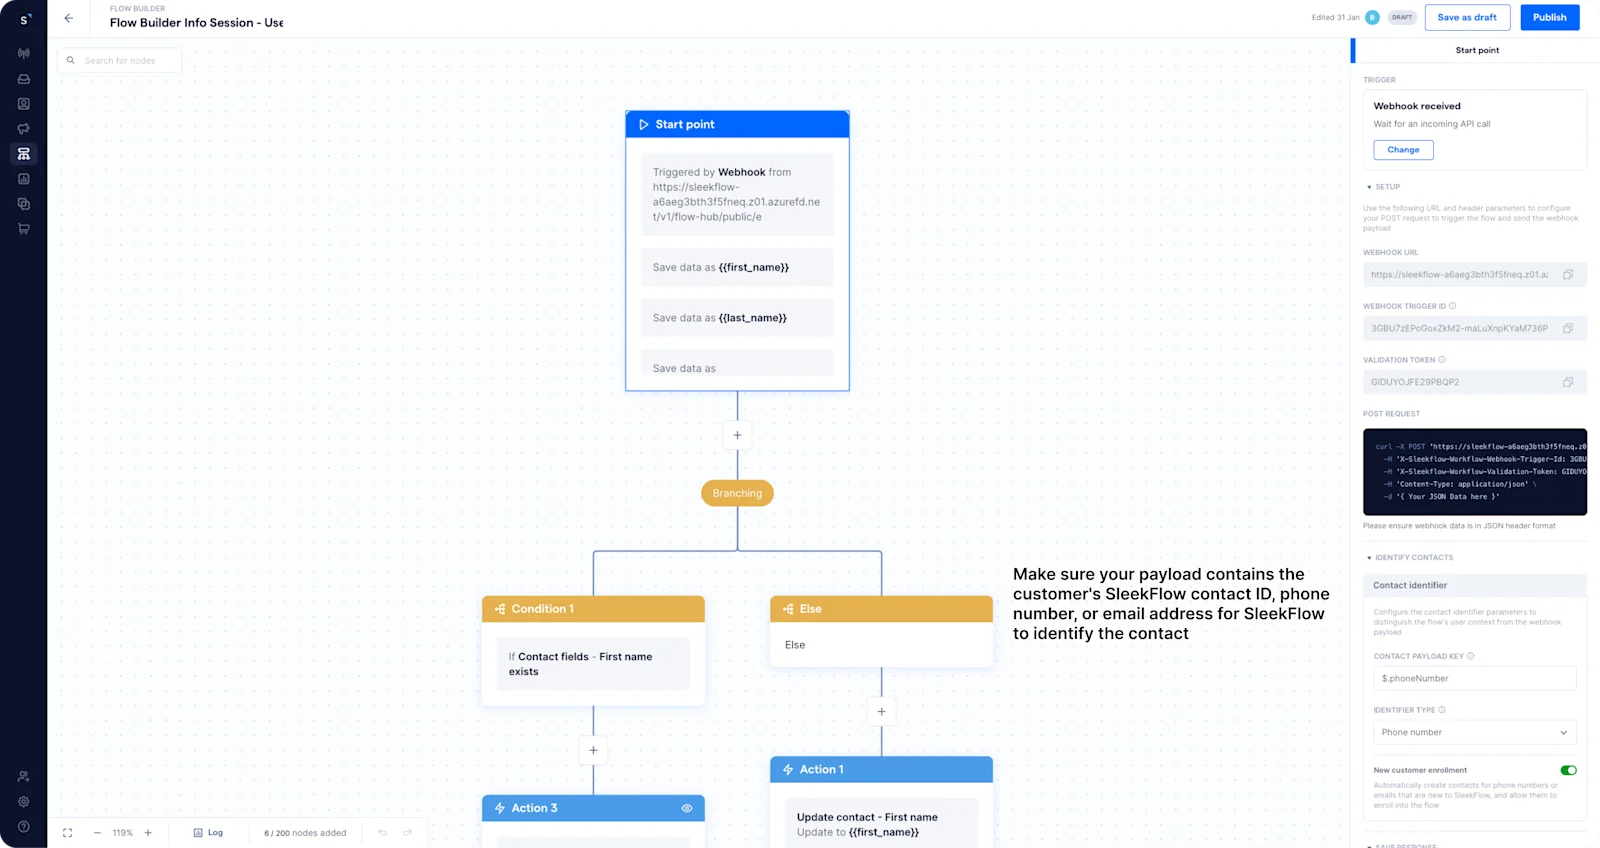
3. Set contact identifier and data configuration in SleekFlow:
Still within the SleekFlow trigger setup, configure the Contact identifier to recognize the contact.
Enable the option for new customer enrollment to add new contacts when they don't already exist in SleekFlow.
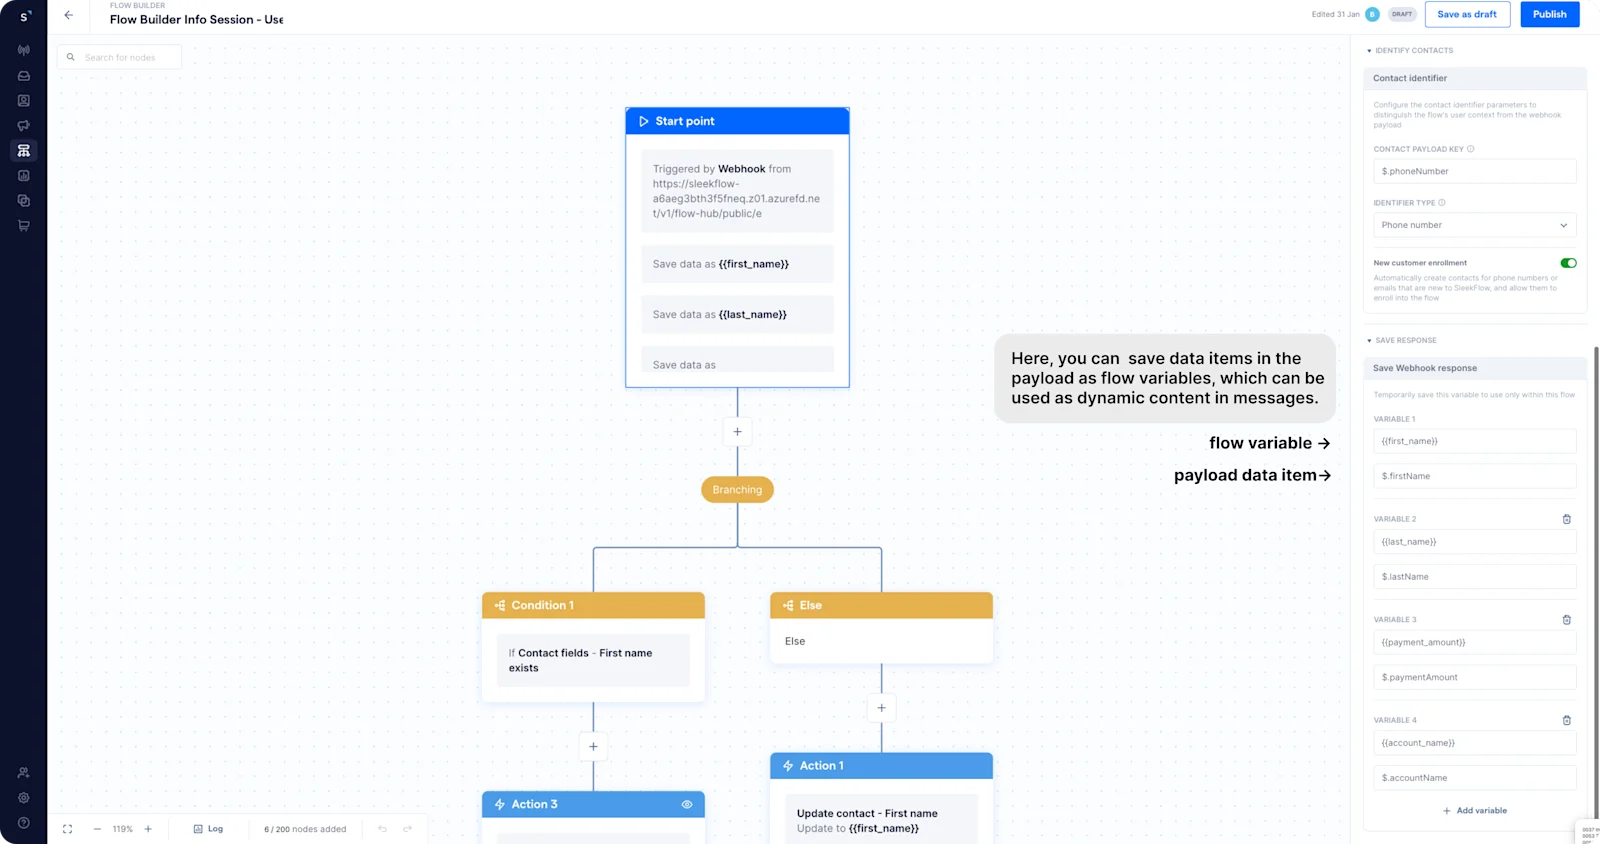
Decide which payload data to save and under what flow variable names they should be stored.
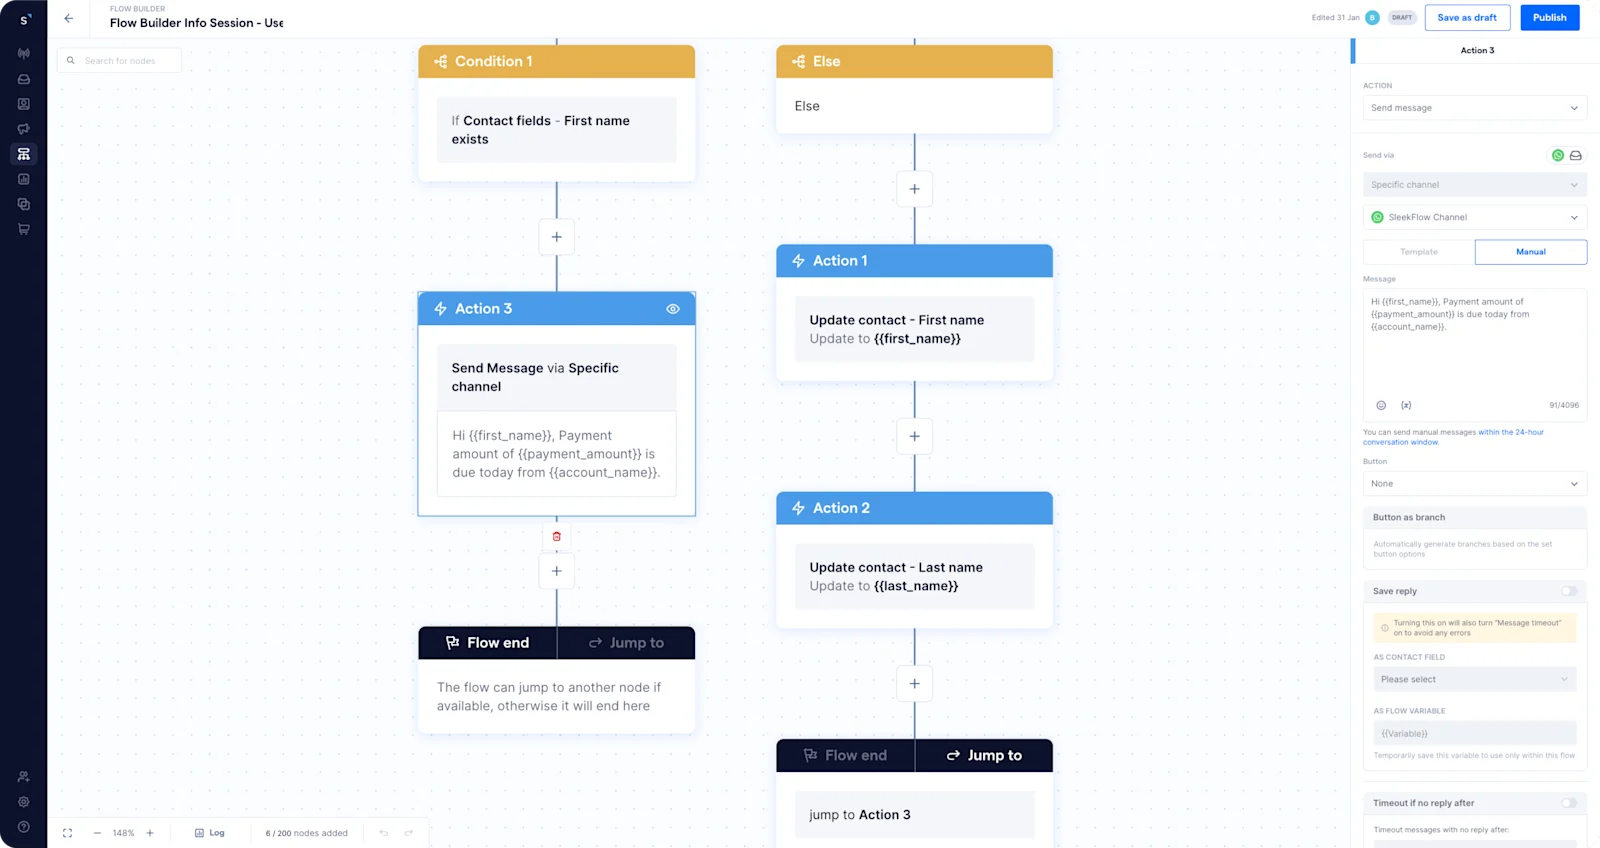
4. Configure a new flow condition & action in SleekFlow:
Set up a condition to check if the contact's first name exists in SleekFlow, indicating if the contact is already known.
If the contact exists, proceed to set up the action to craft a personalized WhatsApp message. Use the flow variables that hold the updated information from Zoho.
If the contact does not exist, add an action to update the contact's details in SleekFlow (e.g., first name, last name) before letting the flow proceed through the “yes” branch, where you can then craft and send the personalized WhatsApp message.
How to integrate SleekFlow with Google Sheets via Webhook (outbound data flow)
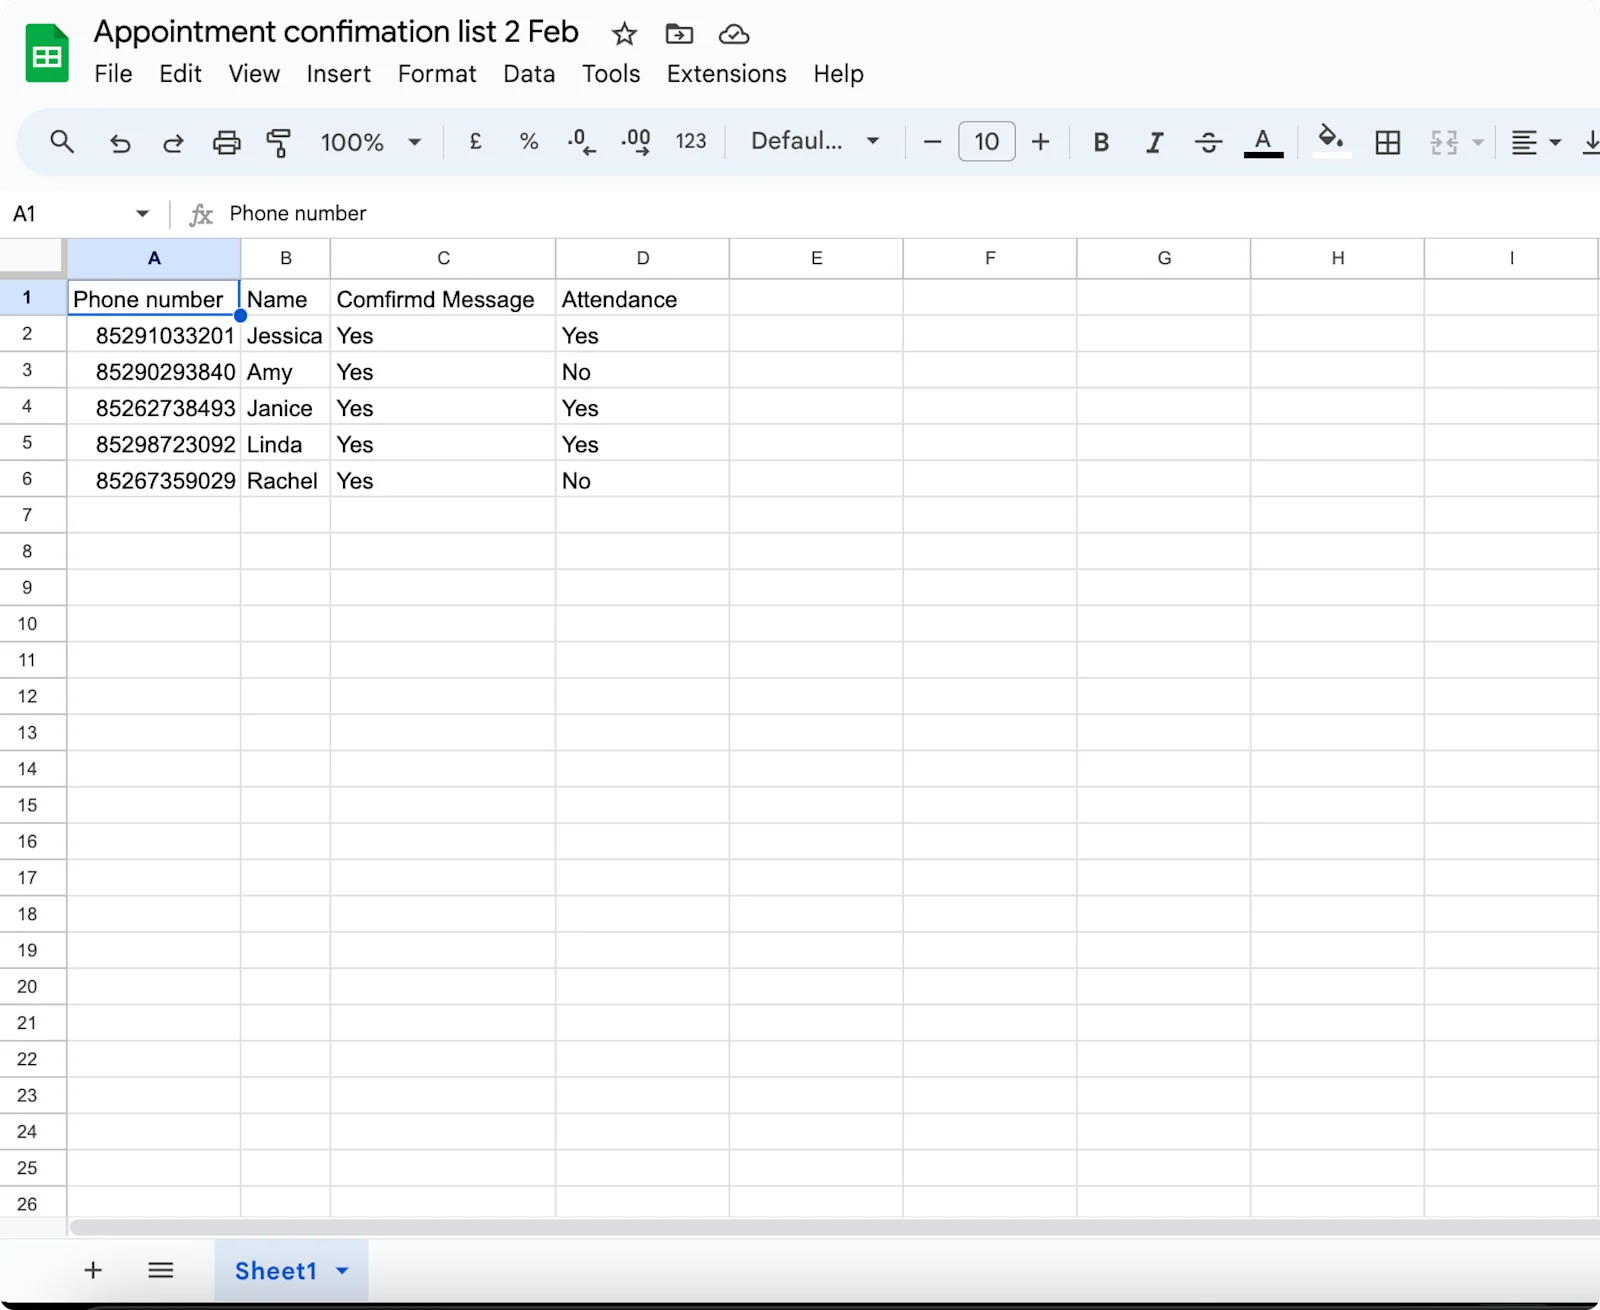
Imagine a beauty salon tracks appointment bookings in Google Sheets and communicates with customers about bookings through WhatsApp. They want to automatically add a new entry in Google Sheets whenever a customer service rep confirms a booking on WhatsApp. This can be done by linking SleekFlow with Google Sheets through Zapier using a Webhook.
Here's a step-by-step guide to streamline the process:
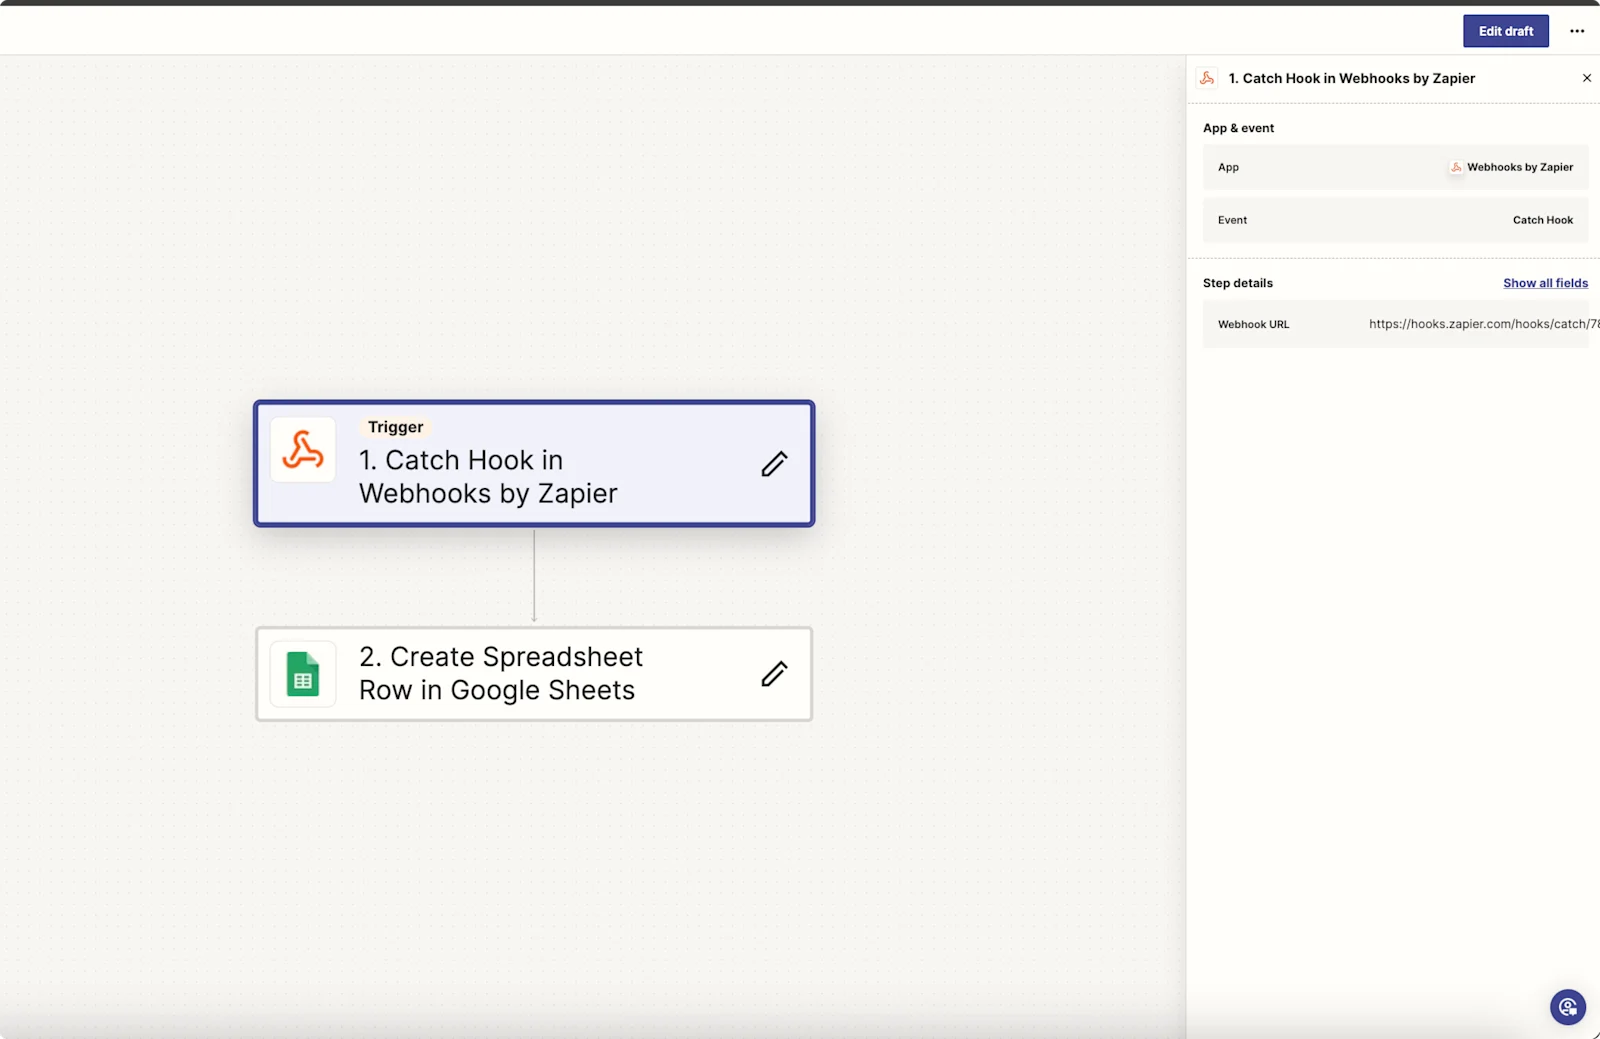
1. Create a new Zap in Zapier:
Start with selecting Webhooks by Zapier as the trigger.
Choose Catch Hook as the event, which will generate a unique Webhook URL for you.
Next, specify Google Sheets as the action destination, selecting Create Spreadsheet Row for what you want to happen next.
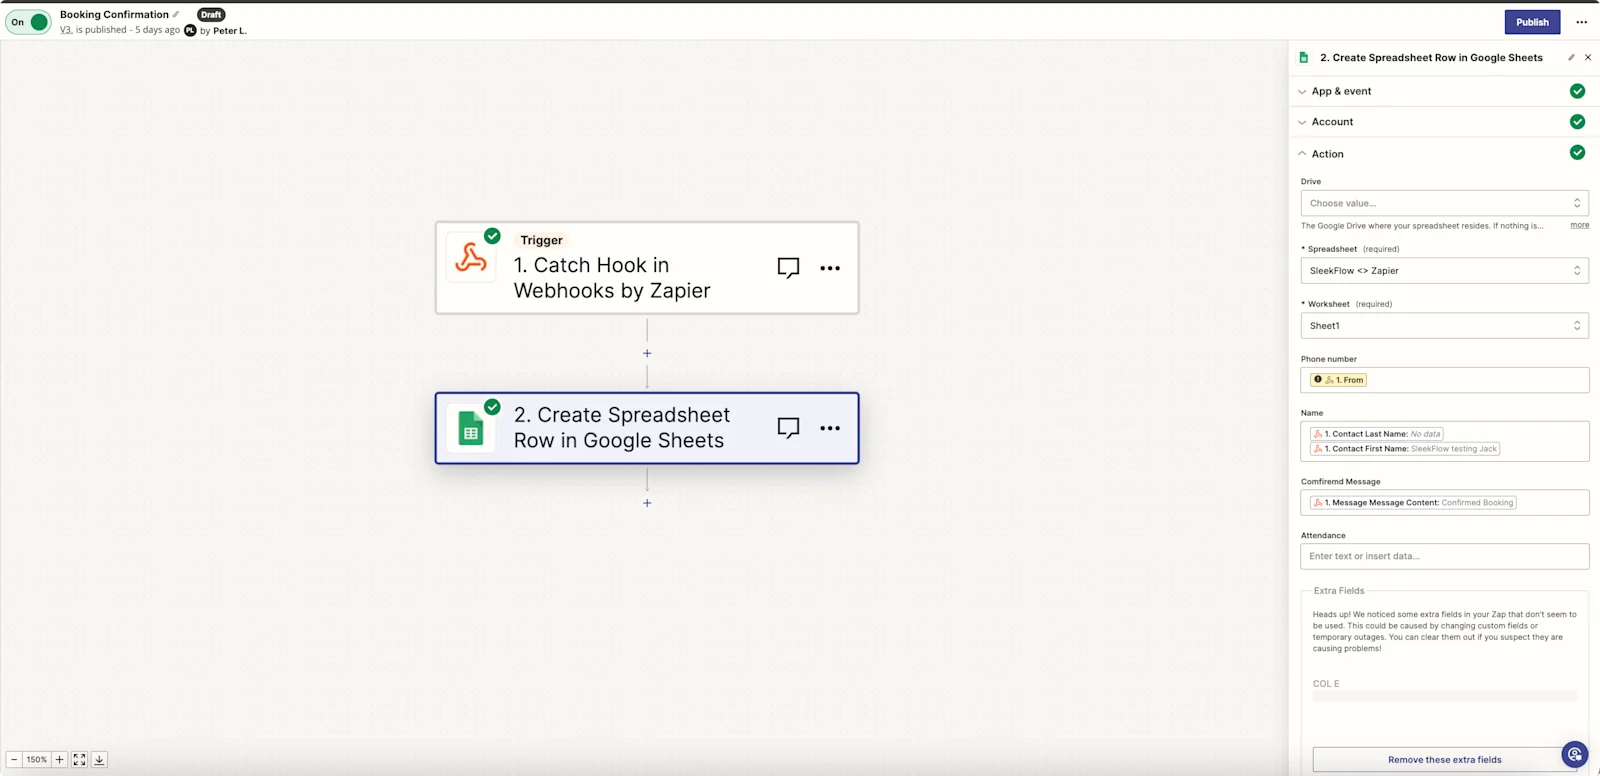
During the action configuration, define which spreadsheet and worksheet to use, and map the specific data items from the payload to the corresponding columns in Google Sheets.
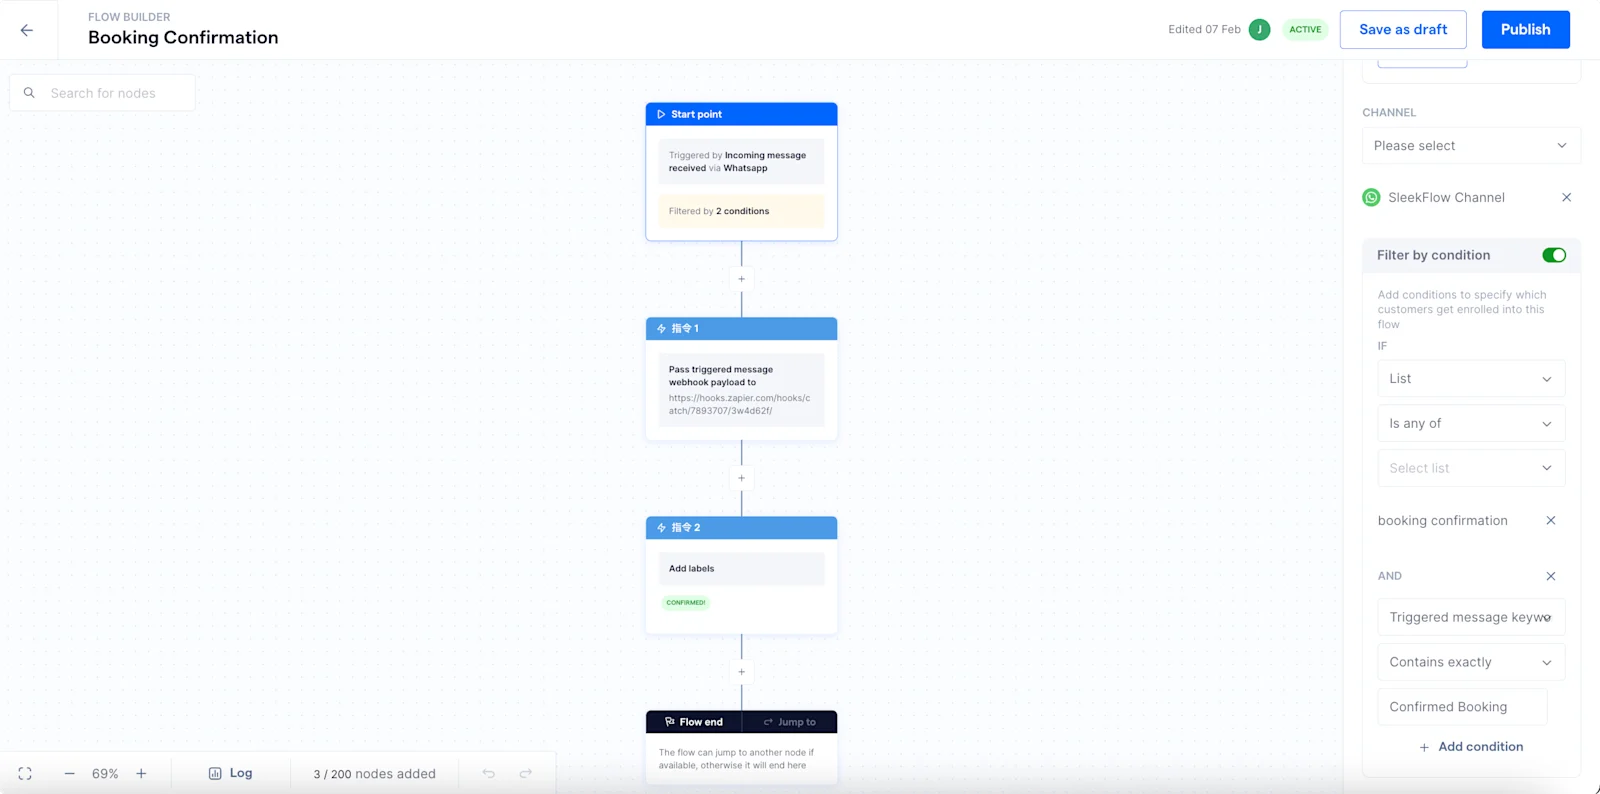
2. Set up a new flow in SleekFlow:
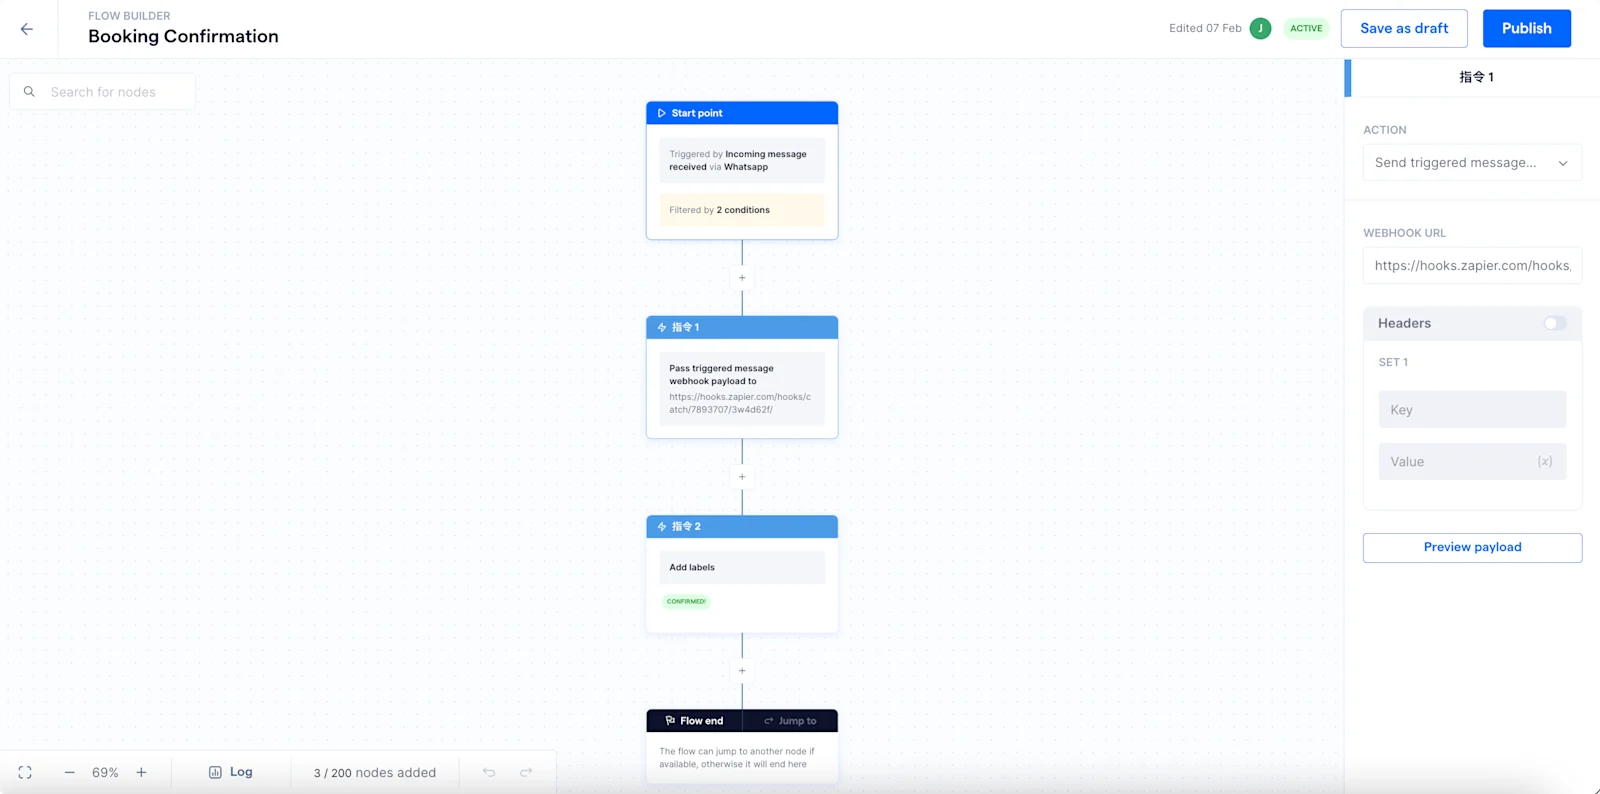
In the Flow Builder, set your trigger to Incoming messages received.
Apply a filter for messages that include "confirmed booking" to target only relevant messages for this flow.
3. Configure the Webhook in SleekFlow:
Add the Pass triggered message Webhook payload action to your flow.
Insert the Webhook URL provided by Zapier into SleekFlow's configuration to establish the connection.
4. Test the Integration:
Try out the setup by sending a test WhatsApp message that confirms a booking.
If everything is set up correctly, you should see a new row added to your Google Sheets with the details from the WhatsApp message.
Want to outcompete your peers with SleekFlow's help?
Book your personalised demo with SleekFlow today and unlock the potential of seamless communication


